

Step 3 — Drawing your travel areas
Draw where you work, set the distance everyone covers for free, and give your team common travel setups to pick from. All of it has to exist before you invite them.
Draw the areas you cover. This is step 3 of four, and it comes before adding your team for a reason worth knowing.
Why before your team
Your staff choose which of your areas they will travel to, and on what terms. Invite them before the areas exist and you are asking them to pick from an empty map. You either do it twice, or you end up filling it in on their behalf, which is exactly the guesswork Logidex is meant to remove.
There is a second reason. When someone is added with an address, Logidex adds the areas near them automatically (see Your standard service radius below). That only works for areas that already exist.
How to draw one
Go to Zones in the left-hand menu and press + New Zone.
- Choose a shape: a circle, a polygon you click out, or a lasso you draw freehand.
- If you chose a circle, drag the radius slider to size it. It sits directly under the shape buttons.
- Give it a name and a color.
- Tick No travel fee for this zone if nobody should charge to work there. More on that below.
- Save.
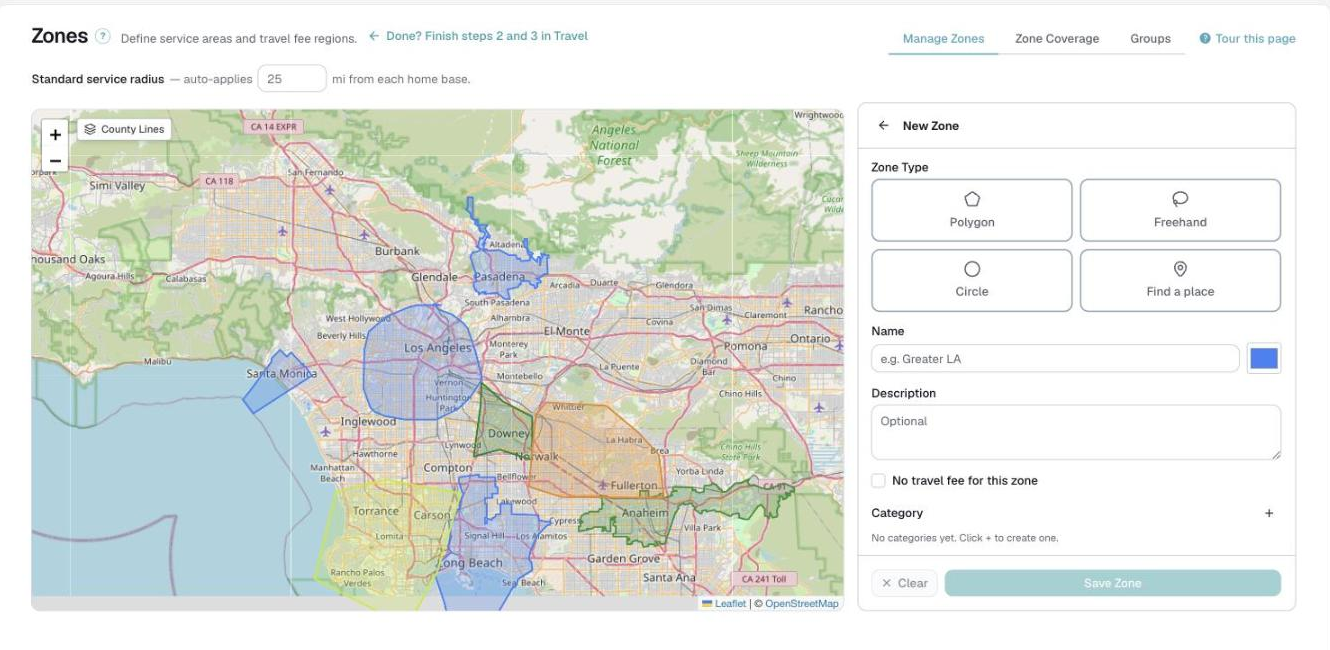
There is also Find a place, which takes a ZIP code and makes a circle, or a city or county name and snaps the zone to that real boundary. That is usually faster than drawing by hand, and it gives you a proper municipal edge rather than an approximation.
Your standard service radius
At the top of the Zones page is one line: Standard service radius, with a box for the number of miles. Set it to the distance you would expect anyone on your team to cover without charging for travel.

When a person is added with an address, Logidex adds every area whose center is within that distance of their home, with no travel fee and no conditions. That happens whether you add them one at a time, import a spreadsheet, or they fill in their own home base in their portal. They start out ready to be matched nearby, and can add a fee or a condition to any of those areas afterward.
Two things worth knowing:
- It only adds. It never removes an area someone chose, and it skips any area they have already set up.
- It runs when an address is saved, not when you change the number. Changing the radius later does not touch people already on your roster. Only addresses saved after the change use the new number.
⚠️ If you need your whole team to start over from the new radius, Customize → Travel has Reset artist travel setups at the bottom. It erases every travel fee, condition and chosen area for everyone, then re-adds only the radius areas. It cannot be undone, and your team will need to set their travel up again.
Areas nobody should charge for
Tick No travel fee for this zone on any area where travel is simply part of the job, such as your home turf. On that area:
- nobody can add a travel fee. The option does not appear for them.
- they can still set a minimum length or particular days, which are the only levers they have left there (see below).
Common setups: the shortcuts your team picks from
Most people charge for travel in one of a few familiar ways. Rather than have everyone build a fee from scratch, you give them a short menu to pick from.
Go to Customize → Travel.
- Under Step 2 · Common Setups, each row is one choice. Turn it on or off with its switch, change its emoji and name, and tap the arrow to open its details.
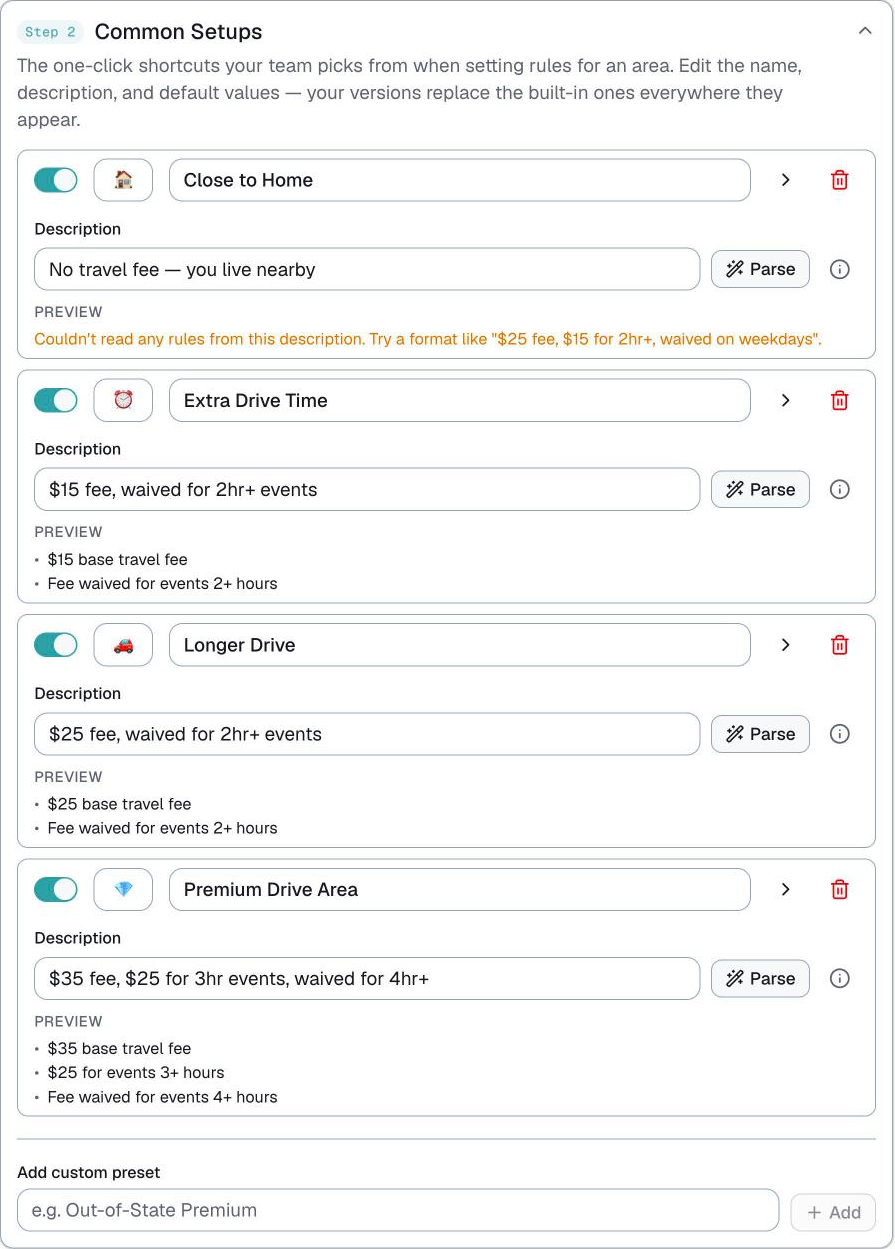
- Write the description in plain words, like "$25 fee, $15 for 2hr+, waived on weekdays", then press Parse to turn it into the rules underneath. Check the rules it filled in.
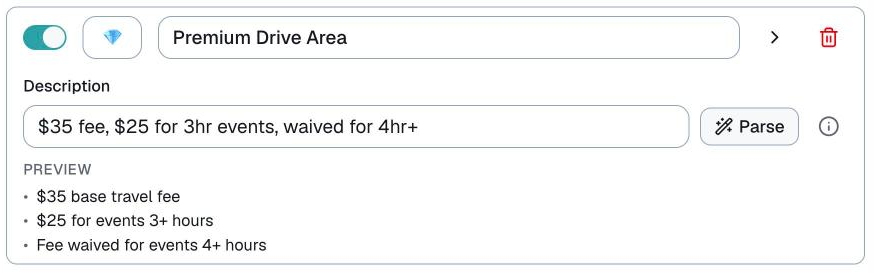
- To add your own, use Add custom preset at the bottom of the list.

- Under Step 3 · Fee defaults & thresholds, set the example fee shown in an empty fee box, and the Short-event threshold: the job length at which a fee is waived automatically. It is 2 hours unless you change it.
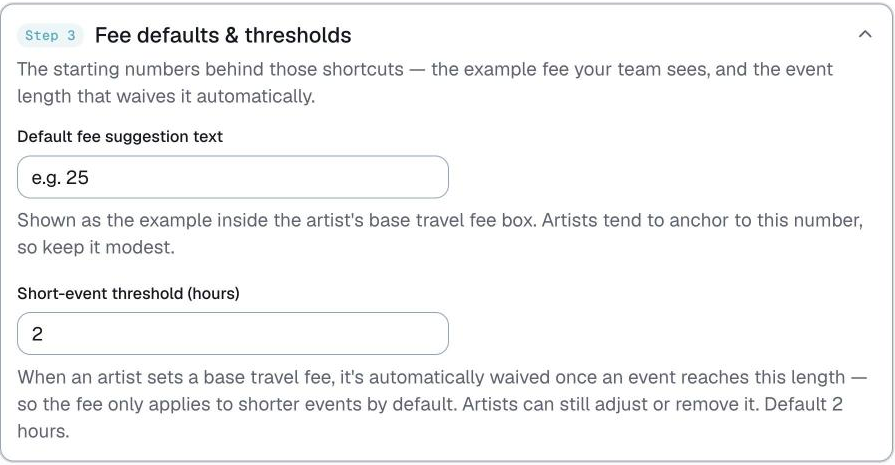
Everything on this page saves on its own.
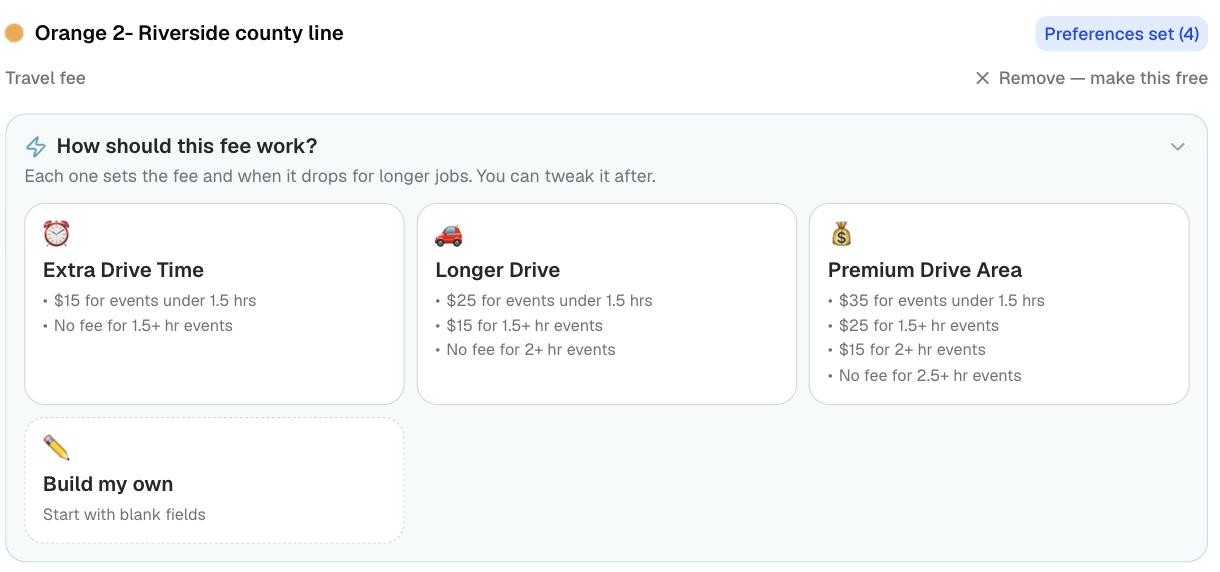
What your team sees. When they tap + Travel fee on an area, these setups open as cards, with Build my own at the end for anyone who wants blank fields. Tapping a card fills in the fee and the length breaks, and they can adjust anything before saving. A fee someone builds themselves is saved automatically as a card of their own, ready for their other areas.
Conditions, and how they combine
Each person can attach any of these to an area:
- a travel fee
- a minimum length for the job
- particular days: weekdays only, or weekends only
They are not all the same kind of rule, and the difference decides who gets offered what.
With no fee, a minimum length is a hard no. "Minimum 3 hours" on a free area means that person is not offered a 2-hour job there at all.
With a fee, length changes the price instead. Once there is a fee, length breaks set what they charge as the job gets longer, for example $25 under 2 hours, $15 from 2 hours, and nothing from 3 hours. A short job can still be offered to them. The fee is what changes.
A fee on its own drops away for longer jobs. When someone types just a base fee, Logidex adds a break at your short-event threshold, so the fee only applies to shorter jobs. They can change or remove that break.
Weekdays can be priced differently. Under the fee, Charge differently on weekdays? gives weekdays their own fee and length breaks.
Days work like the minimum. On a free area, "weekends only" means they are not offered weekday jobs there.
Two conditions: both, or either. When someone sets a minimum and a day limit on a free area, they choose whether both must be true or either one is enough. It reads as a sentence on the screen, so you can check it says what they meant.
On a no-fee area, conditions are the only lever. That is where the hard-no minimum shows up most. If someone who is free and nearby is not appearing for a short job there, check their conditions first.
Opting out is different again. An area someone has opted out of is never offered to them, whatever the fee.
Matching reads all of it. Someone who will only cross town for a four-hour job stops being offered two-hour jobs across town, and you do not have to remember anyone's rules. The full reference is in Travel fees, minimums and day limits.
Getting it wrong is cheap
Areas are easy to change afterward, and changing one does not disturb bookings that already exist. You do not need to get the map right the first time. You need it to exist before you invite anybody.
Last updated