

Setting up client check-ins
A "we're checking in for your event" email to each booked client. Set when they are due, write your messages once, and Logidex fills in each booking.
Client check-ins are the email you send a client before their event: who is coming, when, how to reach them, and anything still owed. You write the message once. Logidex fills it in for every booking, tells you who is due, and keeps track of where each conversation is.
You send it yourself, from your own email. Logidex never emails your clients.
Turning it on
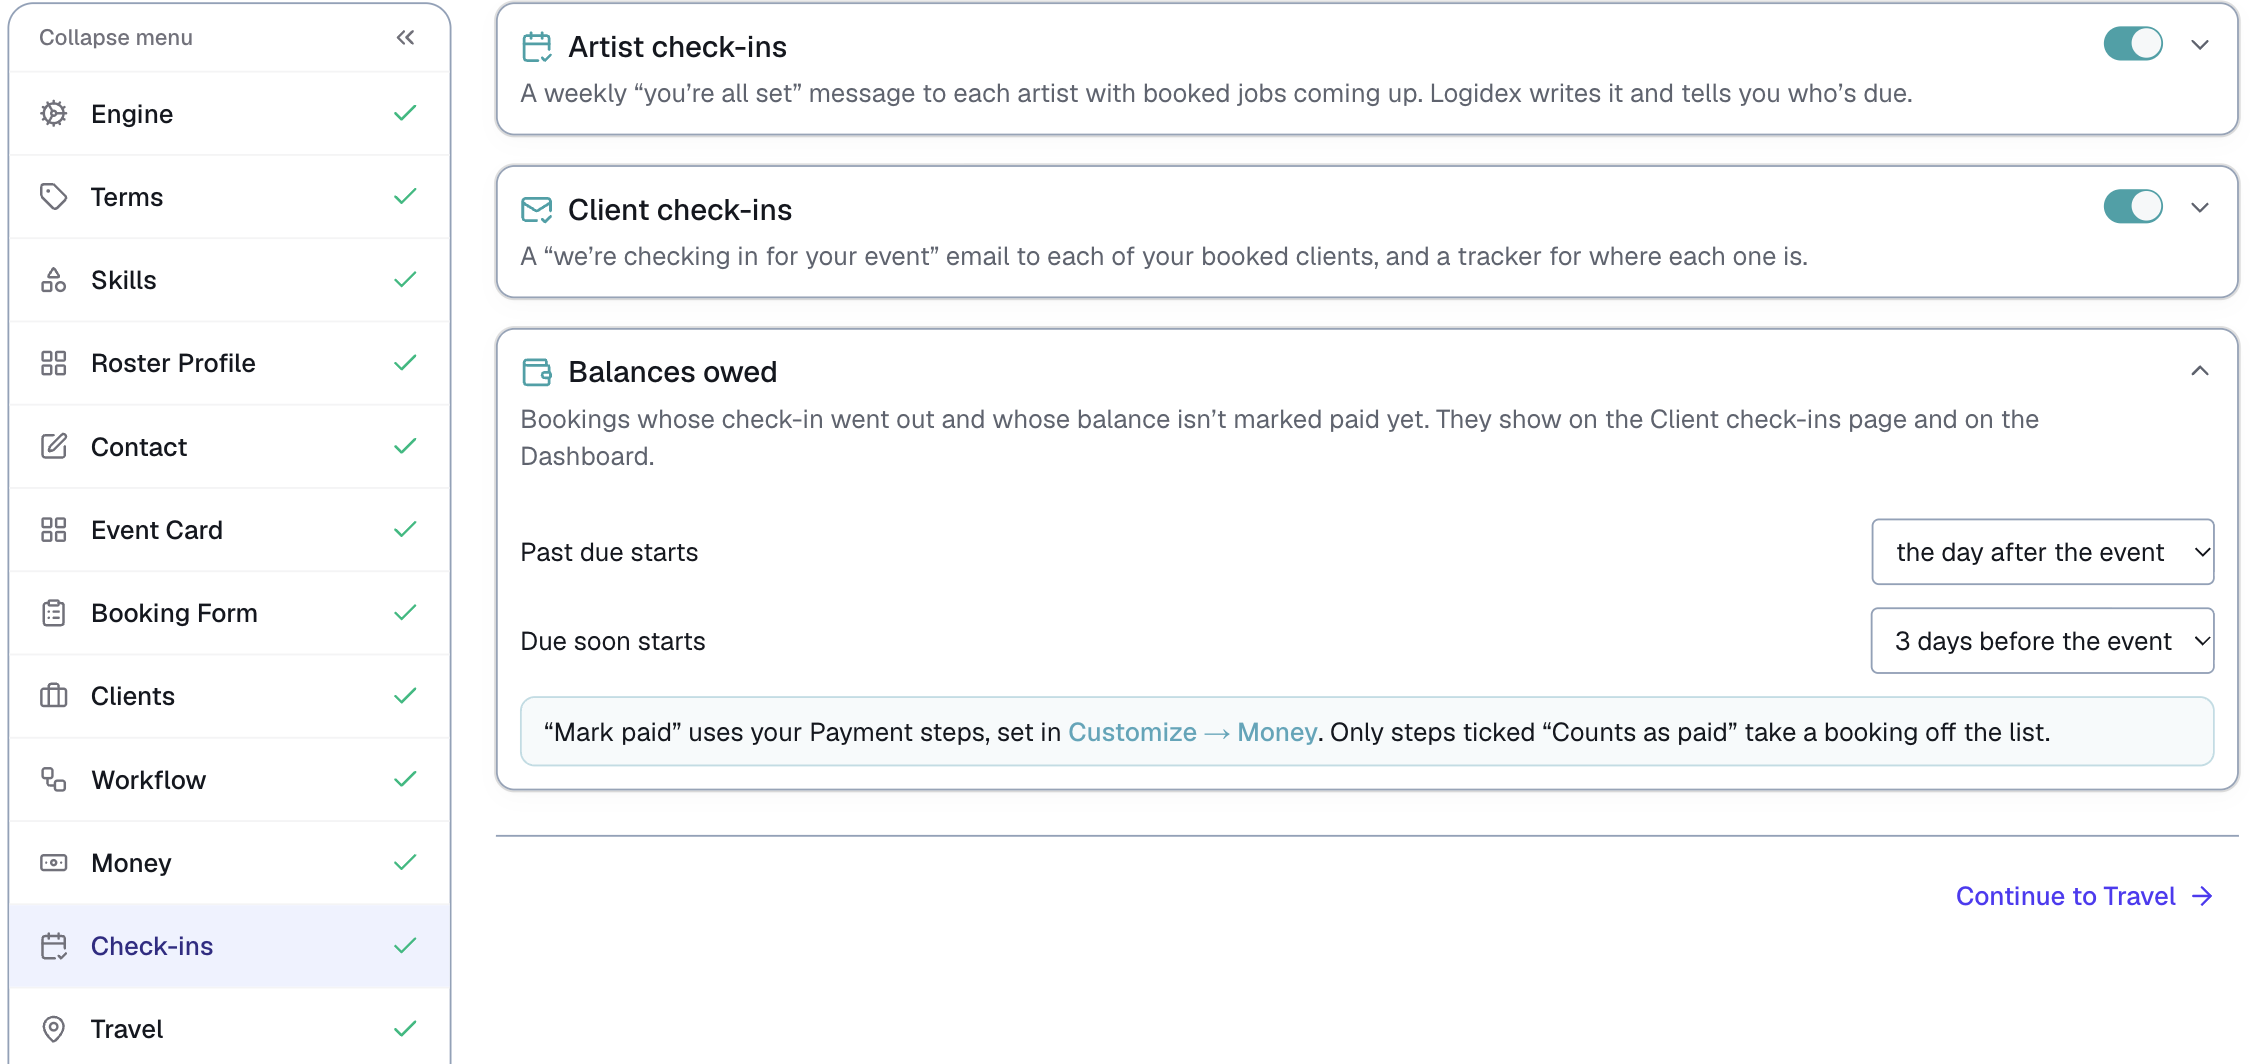
- Go to Customize → Check-ins.
- Find Client check-ins, under Staff check-ins.
- Flip the switch in its header to on.
While it is off, the Client check-ins page, its Dashboard card and the button on each booking are hidden.
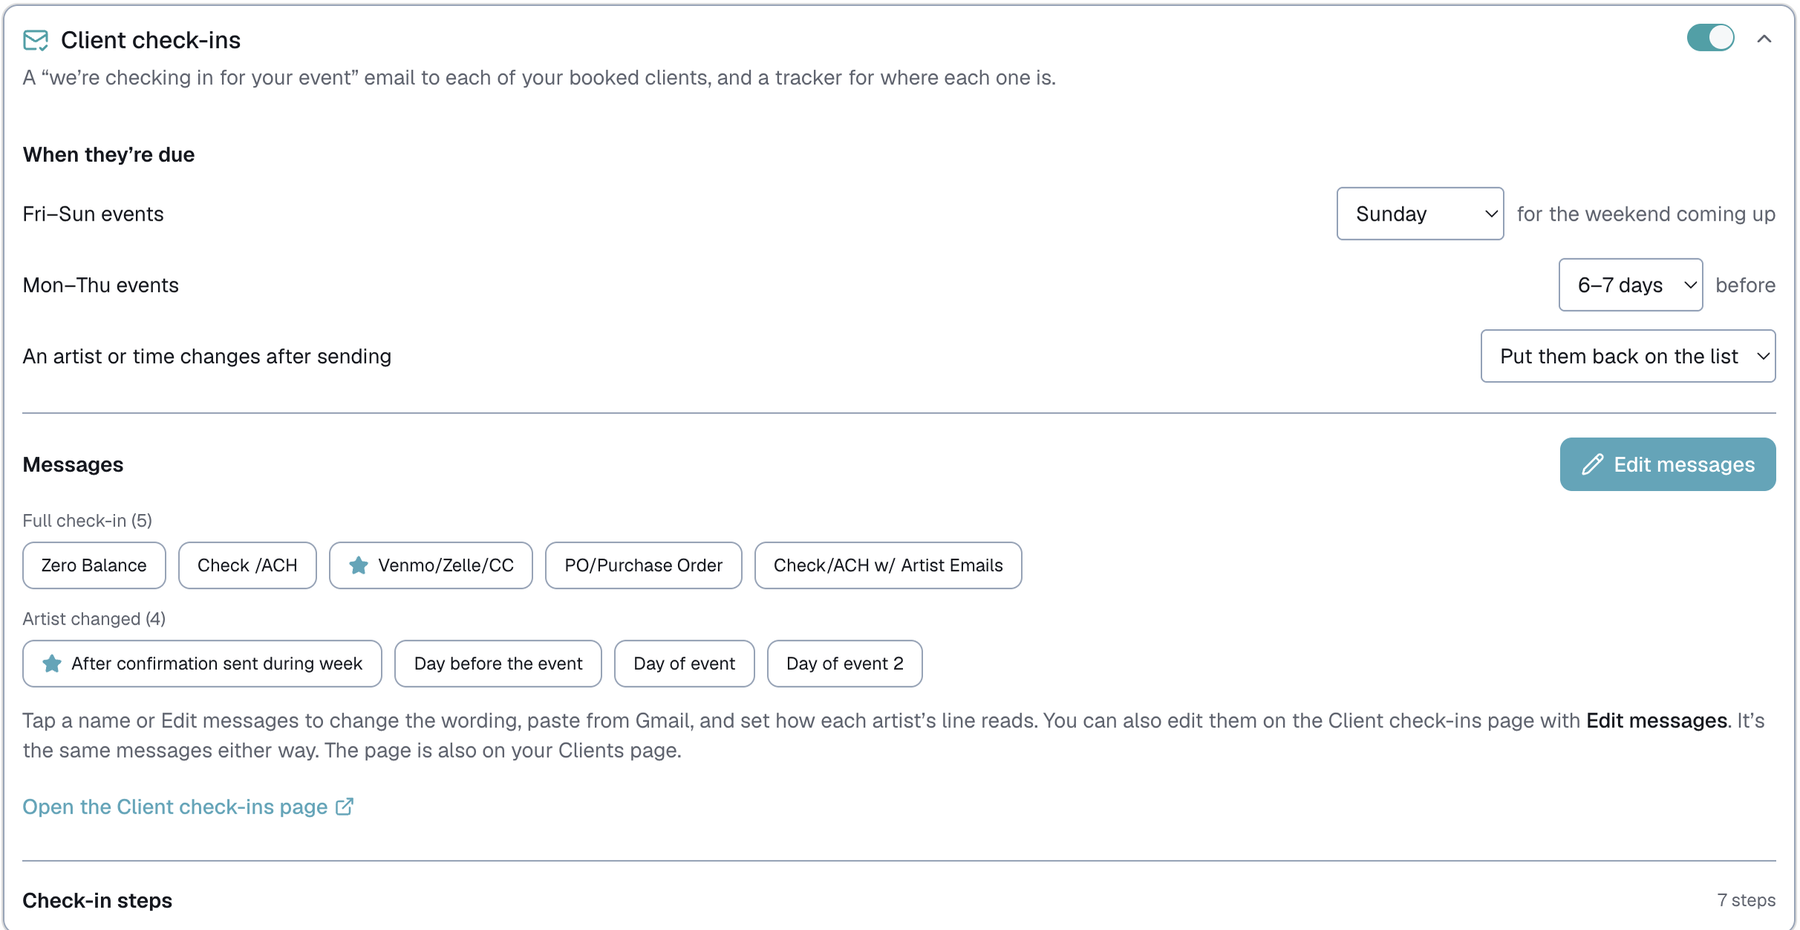
When they are due
Only booked jobs get a check-in, and Logidex looks two weeks ahead.
- Friday to Sunday events are due on one day of the week you pick, for the weekend coming up. Sunday unless you change it.
- Monday to Thursday events are due a set number of days before: 3–4, 4–5, 6–7 or 7–8 days. A booking is due at the far end of that range, so 6–7 means a week before.
- Missed a day? The booking stays on your list until you send it or skip it, so nobody slips through.
An artist or time changes after sending decides what happens when you have already checked in and then the staffing changes. Put them back on the list brings the booking back as an update that only covers what changed. Leave them off the list does nothing.
Your messages
There are two kinds of message, each with as many saved versions as you like:
- Full check-in is the main email.
- Artist changed is the short update after a swap or a new time.
The one with a ★ is the default for its kind. Tap any name, or Edit messages, to open the editor.
The editor
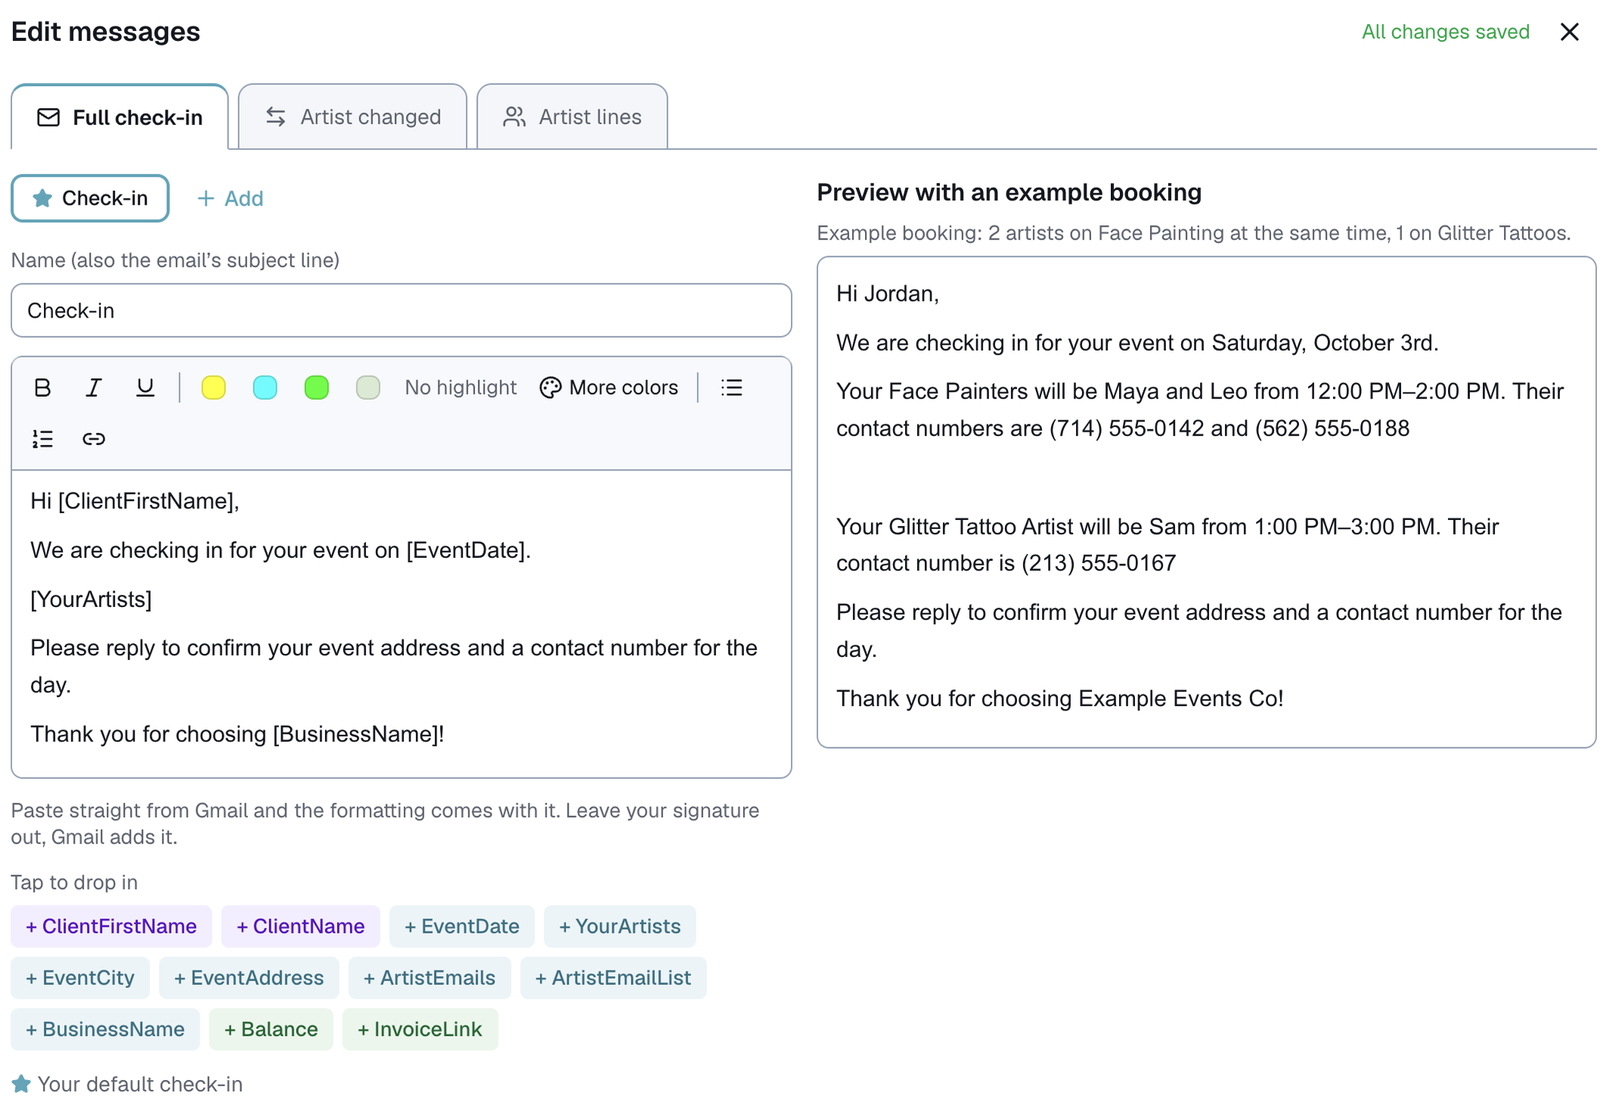
The name of a message is also the email's subject line. Write the message the way you would in Gmail. Bold, italic, underline, highlight colors, bullet and numbered lists and links all work, and you can paste a message straight from Gmail and the formatting comes with it. Leave your signature out, because Gmail adds it.
The preview beside the editor fills your message in with an example booking, so you can see exactly how it will read.
Placeholders
Tap a placeholder under the editor to drop it in. Each one fills in for that booking when you send.
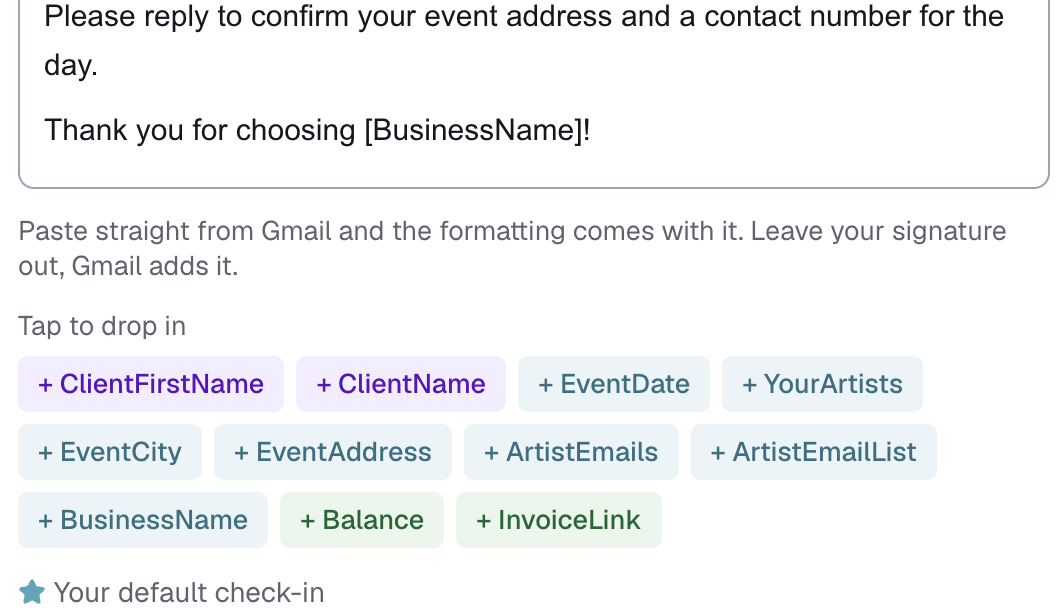
- ClientFirstName and ClientName are the client.
- EventDate reads like "Saturday, October 17th".
- EventCity and EventAddress are where the event is.
- YourArtists lists who is coming. How each line reads is set on the Artist lines tab, below.
- ArtistEmails puts each booked artist's email in a sentence, and ArtistEmailList puts each one on its own line with their name.
- BusinessName is your business's name.
- Balance is what the client still owes on that booking. Once the booking's Payment step is set to a paid one, it prints $0. It only appears while Deposit & balance is switched on in Customize → Money.
- InvoiceLink is the invoice link saved on that booking. It only appears while Invoice link is switched on.
If a booking is missing something a placeholder needs, the email shows it highlighted in amber, like "[no invoice link]", so you see it before you send.
How each artist's line reads
The Artist lines tab sets the line YourArtists writes for each person.
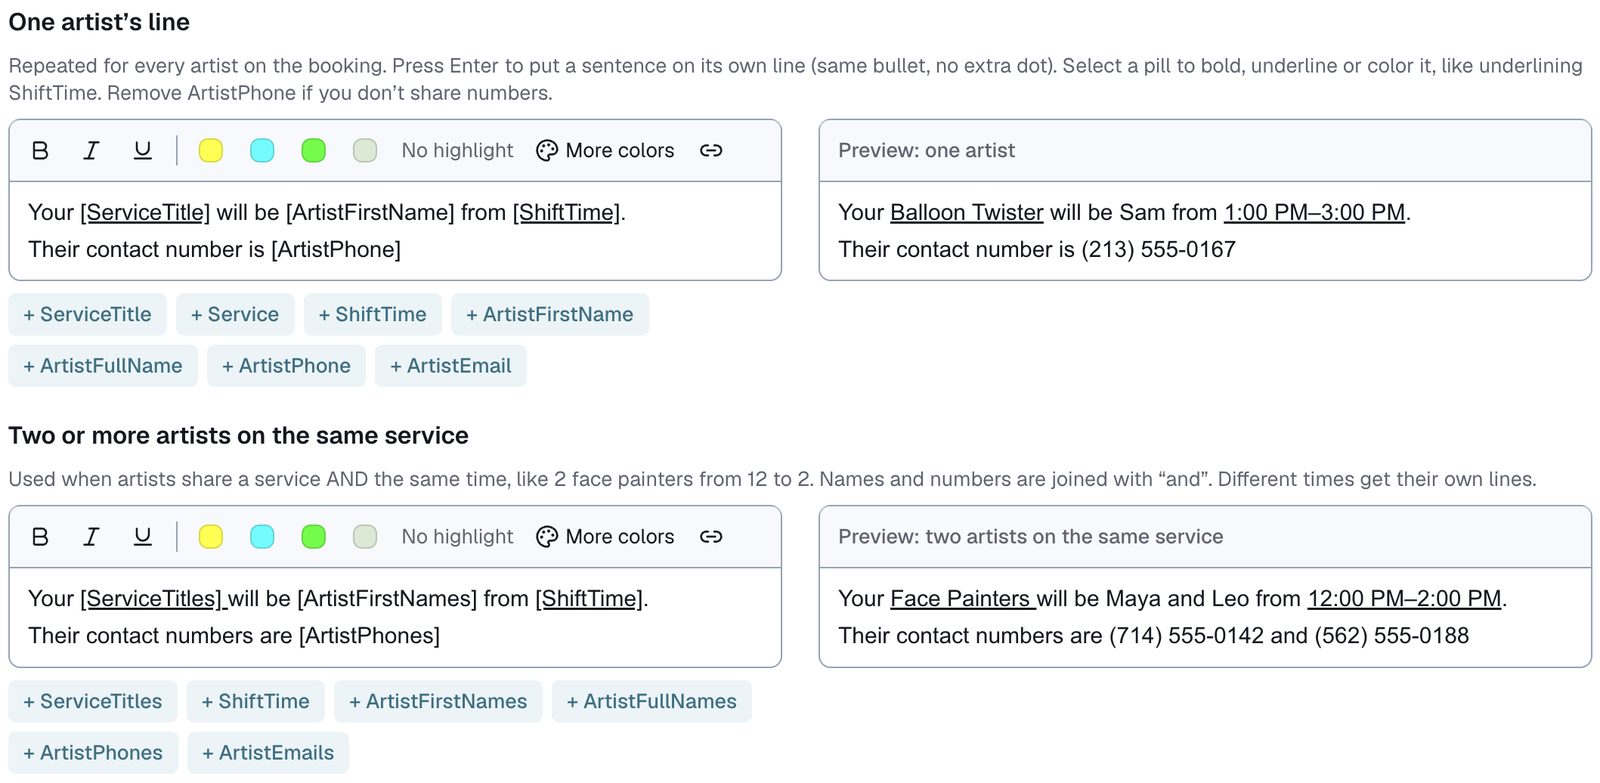
- One artist's line is written once and repeated for every artist on the booking. Press Enter to put a sentence on its own line. Remove ArtistPhone if you don't share numbers.
- Two or more artists on the same service is used when artists share a service and the same time, like two face painters from 12 to 2. Their names and numbers are joined with "and".
- Blank line between artists adds a little space between each person.
- Service Titles is what you call someone doing each service, like Face Painter. You can also add extra lines that only print when that service is booked, like a link to tips for caricatures.
If YourArtists sits in a bullet in your email, every artist gets their own bullet. If it doesn't, they are listed as plain lines.
Artist changed messages
The Artist changed tab works the same way, with placeholders for the change itself: ServiceTitle, ShiftTime, the new artist's name, phone and email, and the name of the artist they replaced.
Check-in steps
At the bottom of the card, Check-in steps is the list in the Check-in dropdown on each booked job, so you can see where each conversation is up to.
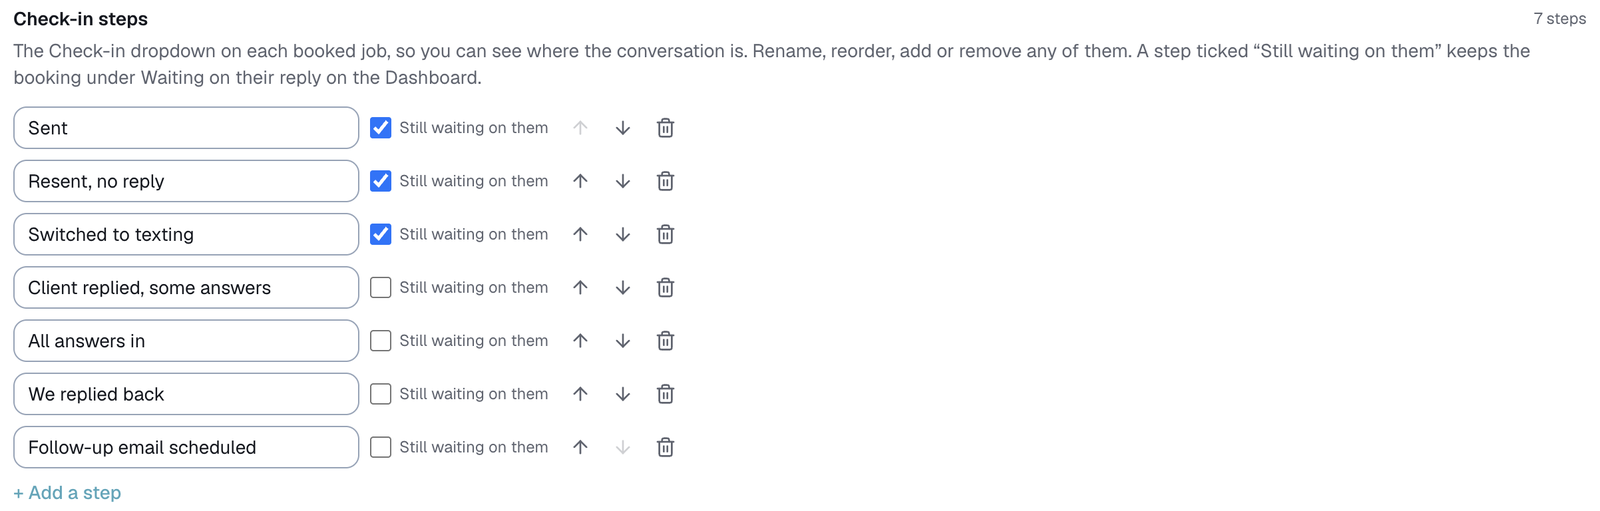
Rename, reorder, add or remove any of them. A step ticked Still waiting on them keeps that booking in Waiting on their reply on your Dashboard. More about this in "Check-in and Payment steps, and a booking's History".
Balances owed
Once a check-in has gone out, a booking whose balance isn't marked paid shows under Balances owed, on the Client check-ins page and on your Dashboard. Its card sits under Client check-ins in Customize → Check-ins, and only shows while Client money is switched on. See Balances owed.
Who can change what
Only the owner can change client check-in settings and messages for now.
Last updated